EdPlace's Year 9 home learning maths lesson: Angles in Parallel Lines
Looking for short lessons to keep your child engaged and learning? Our experienced team of teachers have created English, maths and science lessons for the home, so your child can learn no matter where they are. And, as all activities are self-marked, you really can encourage your child to be an independent learner.
Get them started on the lesson below and then jump into our teacher-created activities to practice what they've learnt. We've recommended five to ensure they feel secure in their knowledge - 5-a-day helps keeps the learning loss at bay (or so we think!).
Are they keen to start practising straight away? Head to the bottom of the page to find the activities.
Now...onto the lesson!
What's It All About?
A common question in exams is finding the missing angles on a set of parallel lines. This guide will show how to demonstrate the rules to remember. Once you recall the rules of parallel lines, calculating any missing angle will become very straightforward.
1) Describe a pair of angles as alternate, corresponding or co-interior,
2) Recall the relationships between these types of angles
3) Calculate missing angles in parallel lines, using the rules learned.
Where to Start?
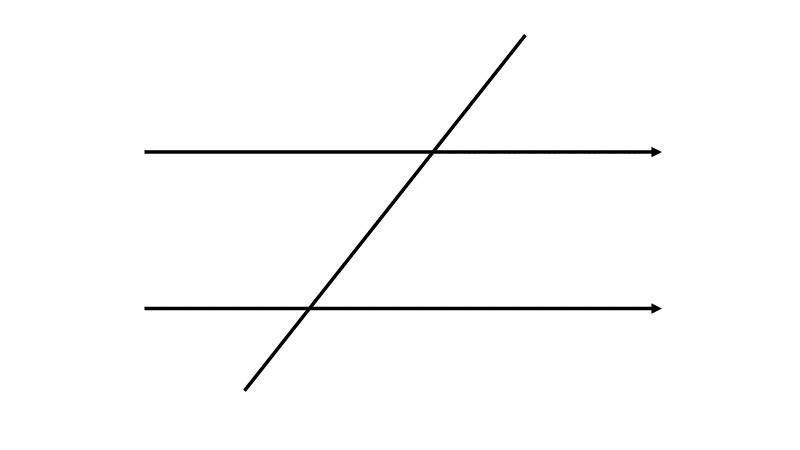
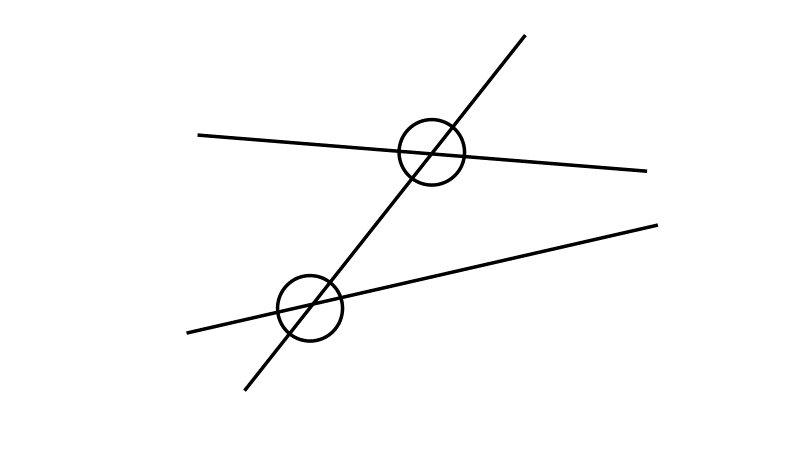
Begin by drawing a pair of parallel lines, then draw a diagonal line cutting through them.
Step 1
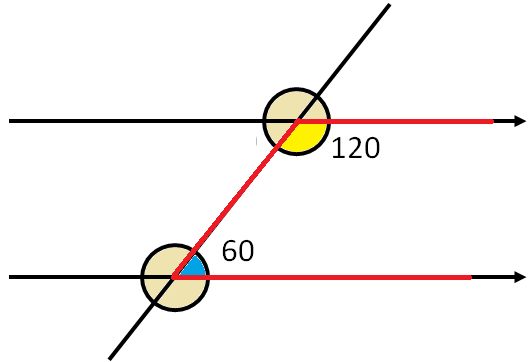
Measure the two angles at the top of the shape. If you don’t have a protractor to hand, let’s say the angles are 120° and 60°.
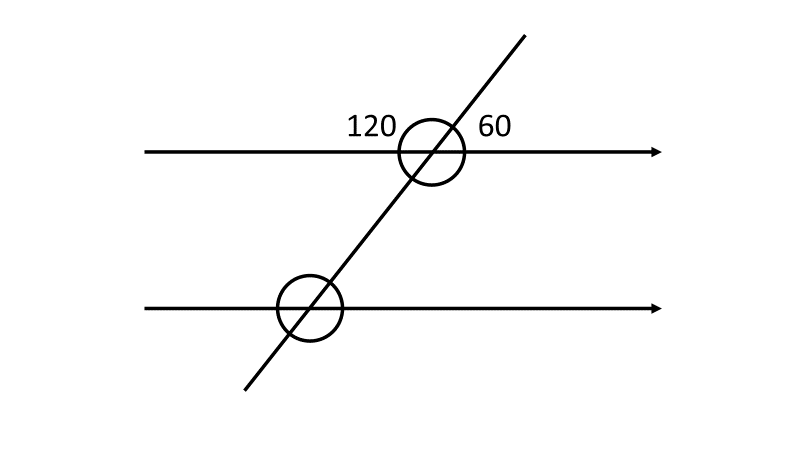
You should know that angles on a straight line always add up to 180° and angles around a point add up to 360°.
Step 2
Here is where the relationships between the angles become obvious. Let’s measure every angle on this shape:
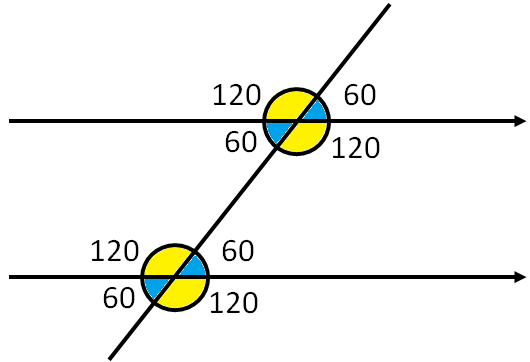
As we can see, all the acute angles are the same and all the obtuse angles are the same. This is an important thing to remember. There are eight angles here but only two different values.
Step 3
As long as we have a diagram of the angles on parallel lines, we can start highlighting parts of it to understand the rules to remember. You can remember them with letters:
If we draw a “Z” on the lines, we can highlight a pair of acute angles (or a pair of obtuse angles).
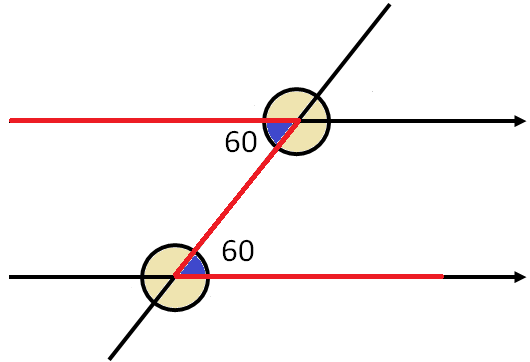
These are called alternate angles. They are always equal.
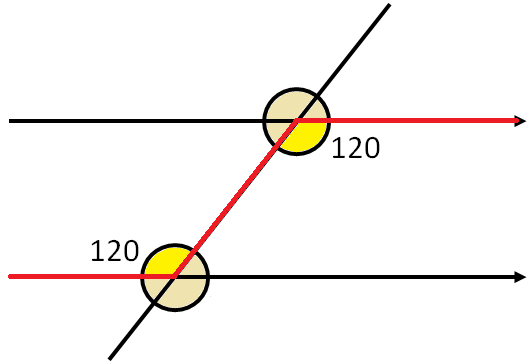
Now let’s draw an “F” over the lines and highlight the angles within the letter:
These are called corresponding angles and are always equal.
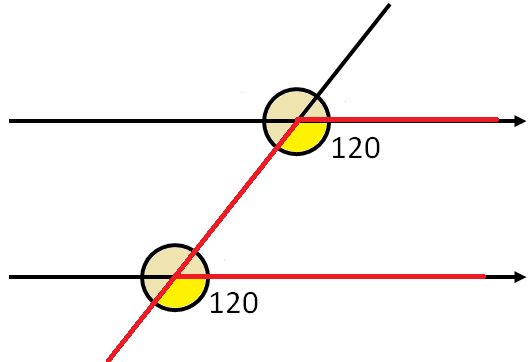
Returning to the original diagram:
The top four angles correspond to the bottom four.
The idea of “corresponding” angles is that the top of the picture exactly matches the bottom. Both the 120° angles on the left-hand side correspond; both the 60° angles on the right-hand side correspond; and so on.
Finally, let’s draw a “C” over the lines and highlight the two angles within it:
The way to think of this is a straight line that has been “bent up”. This pair of angles are called co-interior angles and they will always add up to 180°.
Step 4 - Putting it into Practice
To summarise what we have learned in Step 3:
1. Alternate “Z” angles are always equal.
2. Corresponding “F” angles are always equal.
3. Co-interior “C” angles always add up to 180°.
The last thing to emphasise is that these rules only work if the lines are parallel. A common mistake that students make is applying these rules on lines that are not parallel.
For example:
It is clear to see that the top of the picture does not match the bottom. Angles on a straight line still add up to 180° and angles around a point still add up to 360° but there is no other connection between the two sets of.
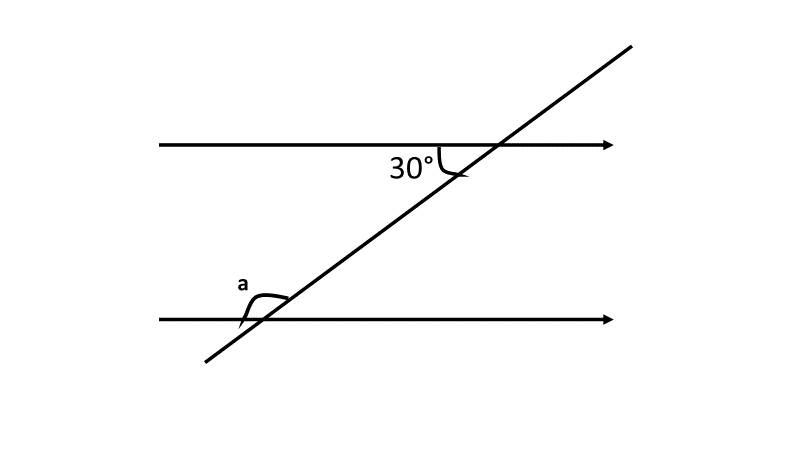
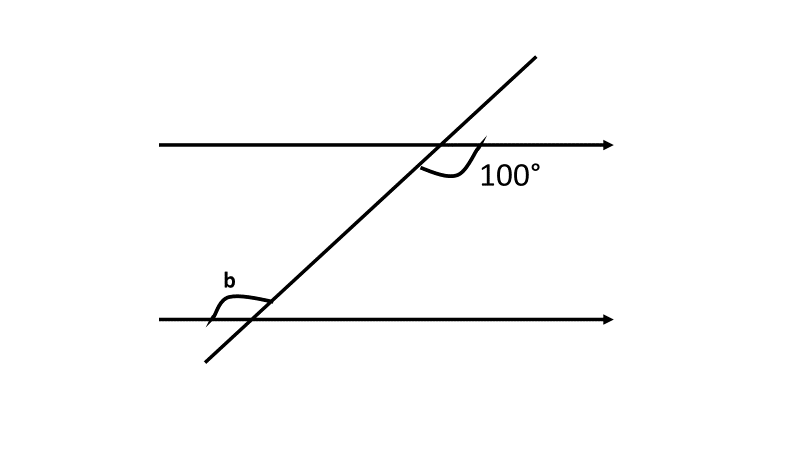
Practice questions
Using the guide, see if you can now work out these missing angles and give reasons for your answers:
(a)
(b)
(c)

Step 5 - Give it a go...
Why not test your child's understanding and see if they can tackle these activities?
All activities are created by teachers and automatically marked. Plus, with an EdPlace subscription, we can automatically progress your child at a level that's right for them. Sending you progress reports along the way so you can track and measure progress, together - brilliant!
Activity 1 - Angles on parallel lines
Activity 2 - Angles in Triangles and on Parallel Lines (1)
Activity 3 - Angles in Triangles and on Parallel Lines (2)
Activity 5 - Exterior angles of regular polygons
Answers
(a) a = 150°. Co-interior angles add up to 180°.
(b) b = 100°. Alternate angles are equal.
(c) c = 70°. Corresponding angles are equal.
Keep going! Looking for more activities, different subjects or year groups?
Click the button below to view the EdPlace English, maths, science and 11+ activity library